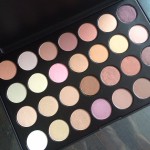
You may have seen my recent post of German cosmetics brand, Zoeva (if not, read it here). One of the purchases I made was of their Nude Matte Palette which contains 28 shades, a collection of neutral tones with a mix of pearlised and matte finishes. It was only right that I had a little play with the palette to suss out the quality of my new purchase. I went for something a bit different colour-wise. If, like me, you’re normally more of a “play it safe” kind of girl and always find yourself opting for nudes and browns, this is a great way to add a bit of colour to your look but still keep it very appropriate for daytime. If you want to know how I got my Purple Haze look, which is also great for those with brown eyes like me may I add, then keep on reading.
Base
For base, I decided to use the Jouer Matte Moisture Tint (in the shade Chamomile), applying it with my Real Techniques Buffing Brush and smoothing it over with my mitts to get it a completely streak free, natural looking finish.
Concealer
As per my last Face Du Jour piece, I concealed the darkness under my eyes with Rimmel’s Wake Me Up Concealer (in the shade True Ivory) then used the Nars Radiant Creamy Concealer (in the shade Ginger) around my nose where I tend to get redness and unsightly broken veins, on my chin area where I have remnants of scars left behind from previous outbreaks and on the hideous spot that has decided to emerge and reside just left of my chin (why is it always around the chin area?). I also put to the test another recent Zoeva purchase and it was the 142 Concealer Buffer Brush which is quite brilliant especially around the nooks and crannies of the nose.
Eyes
To define and groom my skinny brows, I used the Sleek Eyebrow Stylist and then set them in place with the Collection Colour Lash Mascara in Clear.
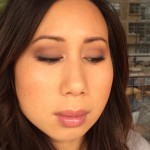
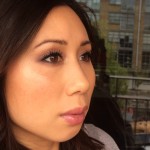
Alas, the eyes. I didn’t want a straight up purple, but more of a neutral, taupe-y tone so I mixed the 4th and 5th shade together from the bottom left of the Zoeva Nude Palette (Matte) to get a hazy purple with a grey/brown tinge to it. I applied this all over the lid up to the crease with the Mac 239 Eye Shader Brush and also ran it under my eyes along the bottom lash line. To add more depth and definition, I applied the 2nd shade from the bottom right into the outer part of the crease with a Mac 219 Pencil Brush for precise application, and then the Mac 217 Blending Brush to blend and smooth out any harsh edges.
To line my upper lash line, I used Charlotte Tilbury’s Rock ‘N’ Kohl Eye Pencil Iconic Liquid Eye Pencil (which isn’t a liquid by the way, but glides on very smooth) in Veruschka Mink, a very dark, dark, cool-toned grey (borderline black) with an ever so slight hint of purple. I also took it along the bottom lash line with a very light hand and smudged it out until I was left with just a hint of colour for subtle definition.
Then of course, I curled my lashes with my ever reliable Shu Uemura Eyelash Curlers before applying lashings of the Maybelline The Falsies Waterproof Mascara. To finally finish the eyes, I dabbed my Zoeva 230 Luxe Pencil Brush into my Mac pot of Vanilla Pigment and applied it into the inner corners (tearduct) of my eyes.
Cheeks
To subtly carve out my cheekbones and to add warmth to my complexion, I decided to use Chanel Soleil Tan De Chanel (after neglecting it for the past few weeks) with the Real Tecjniques Expert Face Brush. To give my cheeks a natural flush, I went in with the Tarte Amazonian Clay 12-Hour Blush in a peachy-pink shade called “Blissful” (which I got from a recent Sephora mini-haul) with my Real Techniques Blush Brush. As always, to highlight the tops of my cheekbones, I used Benefit Watts Up Soft Focus Highlighter dabbed on and blended out with my middle finger.
Lips
I thought an easy, glossy lip would best compliment my purple peepers so I gave my lips a coat of the Nyx Mega Shine Lip Gloss in the shade Beige, which strangely enough isn’t a beige but a pretty, pale pink.
To finish the look and set my base and concealer, I went though the usual step of applying my Rimmel Stay Matte Pressed Powder in Transaparent with a Real Techniques Powder Brush across my forehead and down the centre of my face, and with a Real Techniques Setting Brush under the eyes.
And that’s how I got my Purple Haze look. This is a great way of wearing colour and just goes to show that wearing colours doesn’t have to be so in-your-face. I do generally abide by the rule though, of keeping the lips neutral if you’re going for a bold/coloured look on the eyes and vice versa. It would be too much, particularly in the daytime to wear a strong lip and eye together. Keep it simple and you can’t go too wrong.
